In the world of quilting, the timeless art of piecing together fabric to create intricate patterns has long been cherished.
Among the myriad of quilt patterns available, the Flea Market Flower Quilt Pattern stands out for its charming design and versatility.
In this comprehensive tutorial, we’ll delve into the intricacies of this beloved pattern, guiding you through each step to create your own stunning masterpiece.

Understanding the Flea Market Flower Quilt Pattern
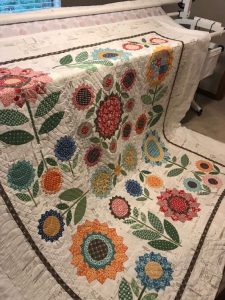
The Flea Market Flower Quilt Pattern is characterized by its whimsical arrangement of floral blocks, reminiscent of a quaint garden in bloom.
Each block is meticulously crafted to showcase the beauty of various fabrics, creating a vibrant tapestry of colors and textures.
Whether you’re a seasoned quilter or a novice enthusiast, this pattern offers endless possibilities for creativity and personal expression.
To begin your journey into the world of Flea Market Flower quilting, gather your materials: assorted fabric scraps or fat quarters in complementary colors, coordinating thread, a rotary cutter, cutting mat, quilting ruler, and sewing machine.
With these tools in hand, you’re ready to embark on a delightful quilting adventure.
Step-by-Step Guide to Creating the Flea Market Flower Quilt Pattern
- Fabric Selection and Cutting:
Start by selecting a variety of fabric scraps or fat quarters in colors that evoke the charm of a blooming flea market.
From vibrant florals to delicate pastels, choose fabrics that speak to your aesthetic sensibilities.
Once you’ve gathered your materials, it’s time to cut them into the necessary shapes and sizes.
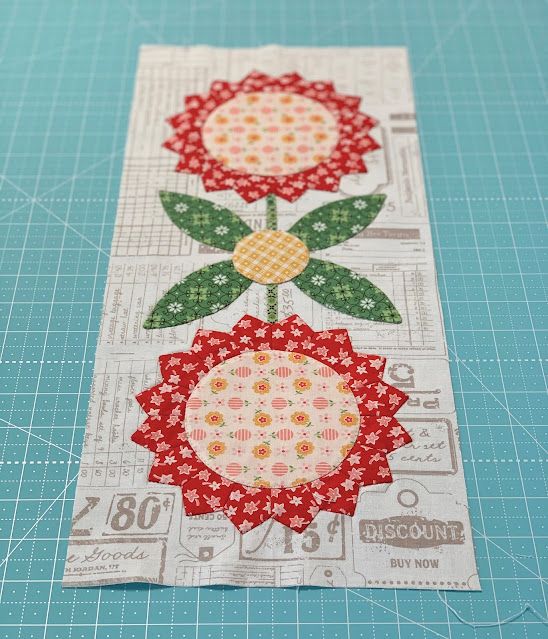
- Cut squares measuring 6.5 inches from each fabric.
- From contrasting fabrics, cut rectangles measuring 2.5 x 6.5 inches.
- For the flower centers, cut small squares measuring 2.5 x 2.5 inches in a complementary color.
- Block Assembly:
With your fabric pieces cut to size, it’s time to assemble the blocks that will form the heart of your Flea Market Flower quilt.
Arrange the squares and rectangles in a visually pleasing layout, alternating colors and patterns to create a harmonious effect.
Place the smaller squares in the center of each block to serve as the focal point of your floral design.
Quilt Top Assembly:
With your blocks complete, it’s time to arrange them into rows to form the quilt top.
Experiment with different layouts until you find one that highlights the beauty of your Flea Market Flower blocks.
Once you’re satisfied with the arrangement, sew the blocks together row by row, taking care to match the seams for a polished finish.
In conclusion, the Flea Market Flower Quilt Pattern offers a delightful opportunity to infuse your quilting projects with the beauty and charm of a blooming garden.
With this tutorial as your guide, you’ll be well-equipped to embark on your own quilting adventure, creating a timeless masterpiece to cherish for years to come.
So gather your fabrics, fire up your sewing machine, and let your creativity blossom with the Flea Market Flower Quilt Pattern.