With Easter just around the corner, why not brighten up your table with a stunning Easter Quilt Table Runner? This festive project combines the joy of quilting with the beauty of spring, offering a fun and creative way to celebrate the season. Whether you’re preparing for a family gathering or simply want to add some seasonal charm to your home, a handmade table runner featuring Easter motifs will make a statement.
This Easter Quilt Table Runner is perfect for quilters of all skill levels. Whether you’re a beginner or an experienced quilter, this project will allow you to showcase your creativity and practice your quilting skills. In this guide, we will walk you through each step to make your own Easter-themed table runner, filled with vibrant colors, spring motifs, and a sense of cheer.
So, gather your materials and get ready to create a beautiful, festive table runner that will brighten any Easter celebration!
1. Materials Needed for the Easter Quilt Table Runner
Before you begin piecing together your Easter Quilt Table Runner, make sure you have the following materials ready. Having all the necessary supplies will make the process much smoother and enjoyable.
- Fabric: Choose fabrics with Easter-themed patterns such as pastel colors, floral prints, or bunny and egg motifs. For the runner background, consider using solid fabrics or a soft, light-colored fabric to allow the Easter patterns to stand out.
- Quilt Batting: Select a lightweight batting for the quilt runner. The batting adds dimension and provides the perfect amount of softness.
- Quilt Backing Fabric: Choose a fabric for the back of the table runner. You can use a coordinating color or a simple pattern that complements the front of the runner.
- Quilting Ruler and Rotary Cutter: These tools are essential for cutting your fabric with accuracy. A quilting ruler and rotary cutter will help you cut even strips and pieces, ensuring everything fits together perfectly.
- Sewing Machine: A sewing machine will allow you to stitch the quilt top, batting, and backing together quickly and neatly. Make sure to adjust your machine to a quilting stitch setting.
- Quilting Pins or Fabric Clips: Use quilting pins or fabric clips to hold your fabric pieces in place as you sew them together. This will prevent shifting while sewing.
- Thread: Choose a thread that matches or contrasts with your fabric. You’ll need a neutral thread for the seams, and you might also want a colorful thread for quilting details.
- Iron and Ironing Board: Press your fabric pieces and seams as you go along to create clean, crisp lines.
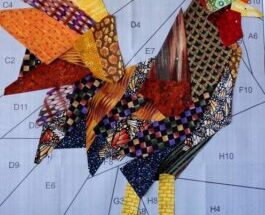
- Easter Quilt Table Runner Pattern: You can either download or create your own Easter-themed pattern, incorporating spring motifs like bunnies, eggs, and flowers. You’ll need this to guide the placement of your fabrics.
2. Step-by-Step Guide to Creating Your Easter Quilt Table Runner
Now that you have all the materials ready, it’s time to dive into the quilting process! Follow these steps to create your beautiful Easter Quilt Table Runner:
2.1. Cutting Your Fabric
- Prepare Your Fabric: Start by pre-washing your fabric to prevent any shrinkage later on. Once the fabric is dry, iron it to remove wrinkles.
- Cut the Main Pieces for the Runner: Using your rotary cutter and quilting ruler, cut the fabric for the runner’s main body. Typically, you’ll need to cut long strips that will form the length of the table runner. Aim for a finished size of about 14″ x 50″ for a standard runner.
- Cut Your Easter Motif Fabrics: Cut smaller fabric pieces for your Easter-themed designs. This could include cutting out squares, rectangles, or shapes for bunnies, Easter eggs, and flowers. These pieces will form the center blocks or the borders of your table runner.
- Prepare the Backing Fabric: Cut your backing fabric to the same size as the quilt top or slightly larger. This will ensure it’s big enough to accommodate any shifting that might occur during the quilting process.
2.2. Piecing the Quilt Top
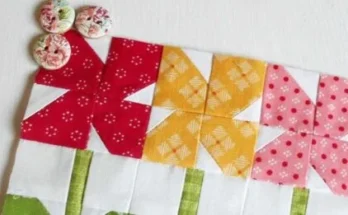
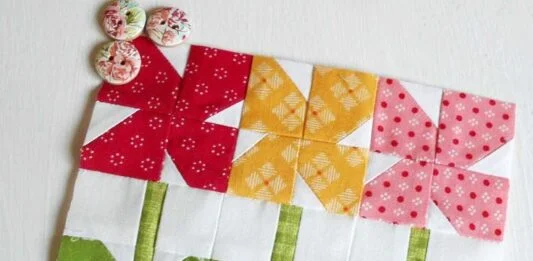
- Arrange Your Easter Motifs: Lay out your cut pieces of fabric for the center blocks of your table runner. You can arrange the pieces in rows or columns, depending on your preferred design. Be sure to balance the colors and patterns for a cohesive look.
- Sew the Pieces Together: Once you’ve settled on the arrangement, start sewing the pieces together. Use a 1/4-inch seam allowance for each piece, and press the seams flat as you go. If you’re using a motif, such as a bunny or egg, you may need to sew those pieces together in smaller units before joining them to the rest of the quilt.
- Assemble the Table Runner Top: Continue adding pieces and sewing them together until your table runner top is complete. Be mindful of how the fabric pieces align to ensure a neat and tidy finished product.
2.3. Adding the Quilt Batting
- Layer the Quilt: Once the quilt top is assembled, lay it flat on your work surface. Place the quilt batting underneath the top fabric, ensuring it’s centered and extends beyond the edges of the table runner. The batting will give your runner its desired thickness and structure.
- Pin or Baste the Layers: Use quilting pins or fabric clips to secure the quilt top and batting together. Alternatively, you can baste the layers with a temporary spray adhesive.
2.4. Quilting the Layers Together
- Choose Your Quilting Pattern: Decide on a quilting pattern that complements the Easter theme. You could quilt in a simple, straight-line pattern, or go for a more intricate free-motion design such as flowers or vines.
- Quilt the Table Runner: Start quilting by stitching through all three layers (quilt top, batting, and backing). Use a quilting stitch to create the design you’ve chosen. You can use your sewing machine for straight lines or free-motion quilting for more creative designs.
- Press the Quilt: After quilting, press the quilt to remove any wrinkles and ensure the seams are smooth.
2.5. Adding the Quilt Backing and Binding
- Trim the Quilt: Once the quilting is complete, trim the edges of your quilt runner to ensure the edges are even. Make sure to leave a small border of batting and backing fabric to prevent fraying.
- Attach the Binding: Cut fabric strips to create the binding for your table runner. Bind the edges of the runner by sewing the fabric strips around the perimeter. You can either hand stitch or machine stitch the binding to secure it in place.
- Final Pressing: Once the binding is attached, give your quilt one final press. This will smooth out any wrinkles and create a crisp, professional finish.
3. Customizing Your Easter Quilt Table Runner
Your Easter Quilt Table Runner is a canvas for your creativity, and there are plenty of ways to personalize it. Here are some ideas for customization:
- Color Choices: Experiment with pastel shades of pink, yellow, blue, and lavender for a traditional Easter palette. Alternatively, use bold spring colors like bright greens, purples, and oranges to make the runner pop.
- Embroidery or Appliqué: Add extra details by embroidering Easter-themed designs or applying fabric appliqué. Consider adding small Easter eggs, floral motifs, or even stitching in the words “Happy Easter” for a personalized touch.
- Mix and Match Fabrics: Don’t be afraid to mix different patterns—stripes, polka dots, florals, and solids—to create a more dynamic and fun design.
- Size Variations: If you want a longer table runner, add more blocks or repeat your motif sections. You can also make smaller runners for individual place settings by shrinking the design down.
4. Ways to Display Your Easter Quilt Table Runner
Once your Easter Quilt Table Runner is complete, here are a few ways to use it:
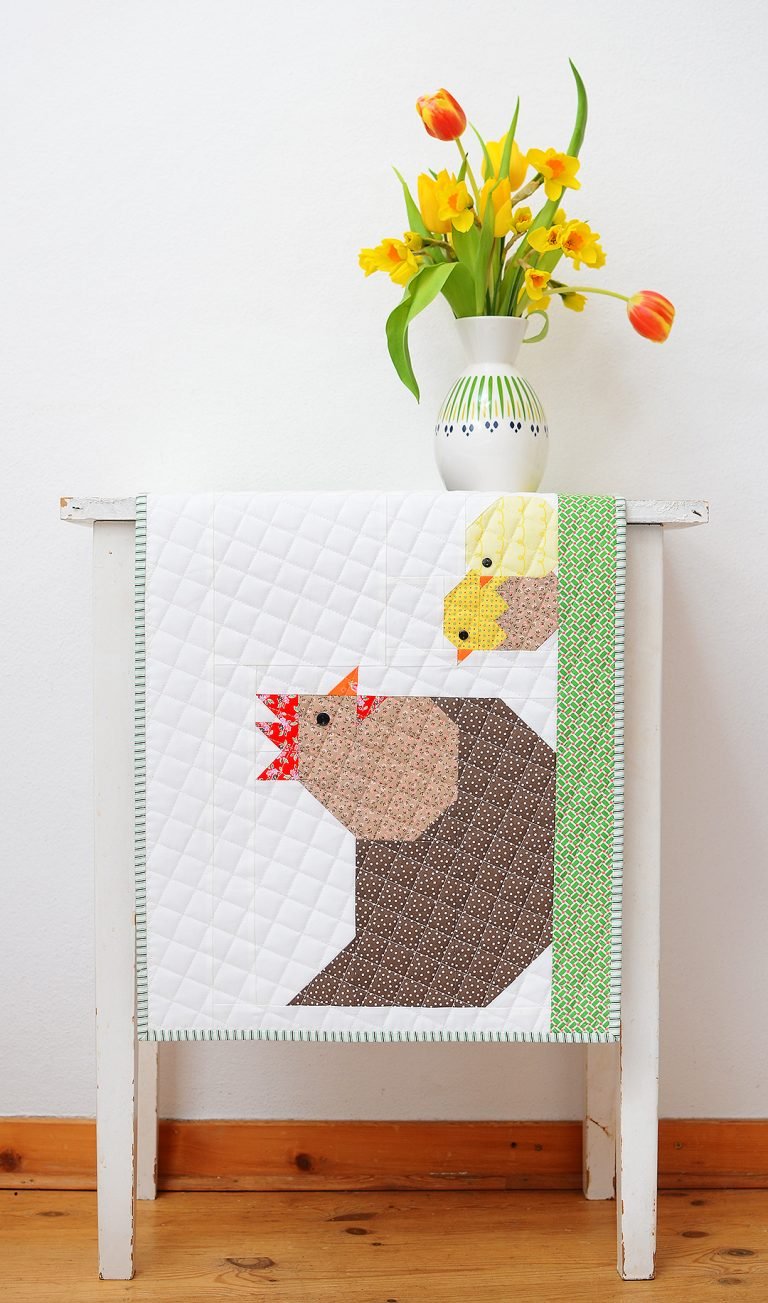
- Dining Table: The table runner is perfect for your Easter dinner table. It adds a festive and welcoming atmosphere to your celebration.
- Sideboard or Buffet Table: Place your finished table runner on a sideboard or buffet table to add charm to the overall décor of your Easter gathering.
- Coffee Table: A smaller Easter quilt table runner can also be displayed on your coffee table as part of your spring or Easter décor.
- Gift Idea: This table runner makes a thoughtful gift for someone who loves quilting or celebrating the Easter holiday. It’s a personal and practical way to show you care.
FAQ
1. How do I choose fabric for an Easter quilt table runner?
Choose fabrics that reflect the colors of spring—think pastel shades, floral patterns, and Easter motifs like bunnies, eggs, and flowers. You can mix solids with prints for added interest.
🌟Join our exclusive Quilt broadcast list on Messenger! Receive the best patterns, tips, and updates directly in your inbox. Our team is ready to send you delightful content that will inspire your projects. Don’t miss this opportunity to stay updated and create amazing pieces. Join now and be part of this passionate quilt community!✨📩
2. Can I make a larger quilt from this pattern?
Yes! Simply adjust the number of blocks and increase the fabric requirements to make a larger quilt or bedspread. You can also customize the size by adding more rows or columns to the design.
3. How can I add texture to my table runner?
You can add texture by quilting with a variety of patterns, like flowers or swirls. Adding fabric appliqué or embroidery will also enhance the texture and make the runner more personalized.
4. Can I use a table runner as a gift?
Absolutely! A handmade Easter Quilt Table Runner makes a thoughtful and meaningful gift, perfect for anyone who enjoys holiday-themed home décor or quilting.
5. How do I care for my quilted table runner?
To care for your table runner, machine wash it on a gentle cycle with cold water. Avoid using harsh detergents or bleach. Hang or lay flat to dry to preserve the quilt’s texture.
Conclusion
The Easter Quilt Table Runner is a delightful and versatile project that adds a festive touch to any home during the spring season. Whether you’re an experienced quilter or a beginner, creating this charming runner will allow you to express your creativity while celebrating Easter. We hope this guide has inspired you to start your own table runner and customize it with your personal flair.
We’d love to hear your thoughts on this project! Feel free to share your creations, tips, or suggestions in the comments below! Happy quilting and happy Easter!